Setting Up FRIDA with Android Device
Setting up Frida Server on an Android device using ADB involves a few steps to prepare your Android device and establish a connection with Frida. Frida Server allows you to interact with the internals of an Android app for various purposes, including dynamic analysis and security testing. Here’s how you can set up Frida Server on an Android device using ADB:
Prerequisites:
- A rooted Android device.
- A computer with ADB (Android Debug Bridge) installed.
- Python and PIP installed in the PC
Installing FRIDA in Windows
pip install frida
Steps:
Root Your Android Device (if not already rooted): Frida Server typically requires root access to run effectively on an Android device. Rooting your device will provide the necessary privileges.
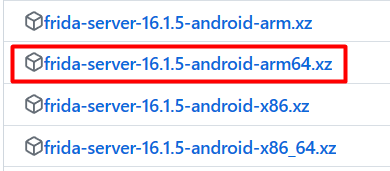
Download the Frida Server Binary: Visit the official Frida GitHub releases page (https://github.com/frida/frida/releases) to download the appropriate Frida Server binary for your Android device. Make sure to choose the correct architecture (e.g., arm, arm64, x86, x86_64).

💡 adb shell getprop ro.product.cpu.abi : write the following command in cmd window to check for Architecture (arm, arm64, x86, x86_64)
💡 rename frida-server-16.xx.xx-android-architecture filename to just frida-server
3. Push the Frida Server to Your Android Device: Use ADB to push the Frida Server to your device. Open a command prompt or terminal window and navigate to the directory where you downloaded the Frida Server. Use the following ADB command to push it to your device (replace frida-server with the actual file name):
adb push frida-server /data/local/tmp/

4. Set Execute Permissions for the Frida Server Binary: After pushing the binary to your device, you need to make it executable. Use ADB to set the execute permissions with the following command:
adb shell "chmod 755 /data/local/tmp/frida-server"
5. Start Frida Server on Your Android Device: To run Frida Server on your Android device, use the following ADB command:
adb shell
su
/data/local/tmp/frida-server &
## Check If frida is working as root
ps -e | grep  frida-server

This command will start the Frida Server and it will listen for connections on a specific port (usually 27042).
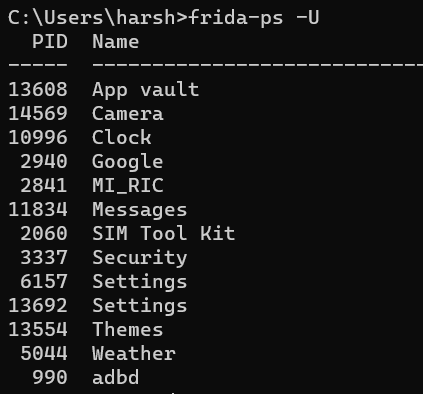
- Verify if FRIDA is properly installed using the following command
frida-ps -U


If you face the following Error “Unable to load SELinux policy from the kernel: Failed to open file ?/sys/fs/selinux/policy?: Permission denied”
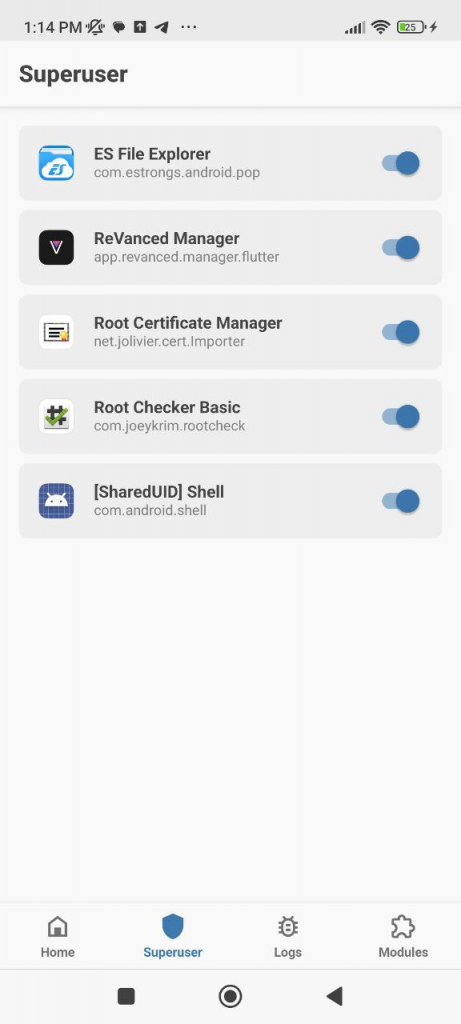
Then make sure you have enabled root for ADB in Magisk (IF not then follow the below steps)
- Open Magisk Manager
- Goto “SuperUser” Option in bottom menu and Enable com.android.shell

- This will enable root for ADB shell
- Now run the following command in CMD window
adb shell su

6. Verify That Frida Server Is Running: You can verify that Frida Server is running by checking the device’s system logs. Use the following ADB command to view the logs:
adb logcat | grep frida
If Frida Server is running correctly, you should see output indicating that it has started.
7. Connect to Frida Server from Your Computer: On your computer, you can now connect to the running Frida Server using the Frida CLI tool or other Frida-related tools.
For example, you can use the Frida CLI to list the running processes on the Android device:
frida-ps -U
The -U flag instructs Frida to use the USB connection to your Android device.
You are now set up to use Frida for dynamic analysis of Android apps on your rooted device. Keep in mind that rooting your device can have security implications, and be sure to use Frida responsibly and within legal and ethical boundaries.

